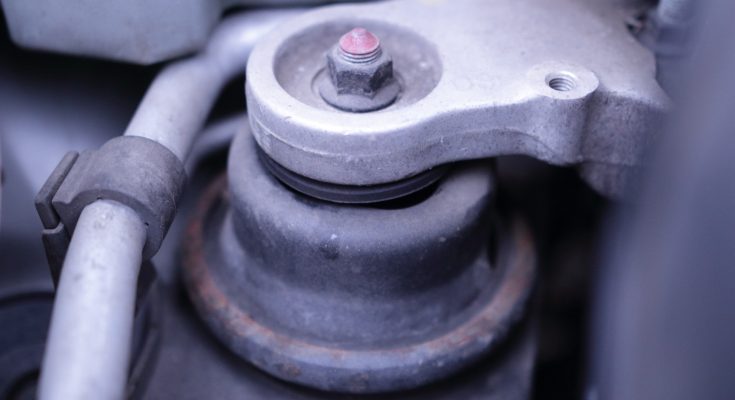
It can happen that, especially when idling, the entire car vibrates during engine operation. Such a situation can arise for many reasons. Sometimes even faulty diesel injectors can be a problem. Much more common is the defect that is connected to the fact that the so-called silent blocks are defective. In this case, the vibrations of the engine are transmitted to the body, which can result in not only the body vibrating but also the seat itself.
The first step should be to check whether it is really this particular defect or not. If so, the engine silentblock should be replaced. The given problem can usually be recognized very simply, in the way that, for example, the strut of the engine tilt itself is damaged. This is one of the most important components, which has an effect on the fact that the engine subsequently transmits the vibrations themselves to the body area. Let’s see together how to put everything in order.
We’ll lift the car
We are going to the first step of the whole exchange, which is connected with the fact that it is necessary to use a car jack, because we need to get the car up. And that’s because we need to get under the engine itself. If we do not have a workshop with the necessary equipment, there is certainly no need to despair, as an assembly pit, for example, or another alternative can also help. Today, all of these are options for getting under the car quite simply and without any problems. If everything is ready, we can proceed with the exchange itself.
The engine cover must be removed
If we don’t have it in our car, our work is one step easier. In most cars, however, the given cover is there and therefore needs to be dismantled. Let us remind you that this is a plastic cover that is placed on the lower part of the engine and primarily prevents it from possible damage. The attachment system of the given cover can be different across different cars and also car manufacturers. On the other hand, we must not forget that its disassembly is relatively simple, and anyone should be able to do it. In essence, it is nothing more than a step in which we only remove the screws that hold the cover in place. Once it is dismantled, we should already have easy access not only to the engine itself but, of course, also to the most important thing, which is the particular strut that we need to replace.
We loosen the screws
Again, it primarily depends on what specific type of car we have. In this direction, we will be rather universal, although we must say that the given procedure is applicable to most cars on our market today. If we start with the first step, it is nothing more than the necessity of loosening the two screws with which the strut is mounted. If we have a problem with their loosening, it is certainly necessary to use, in addition to a greater force, possible preparations that will usually help us loosen a particular stuck joint. After that, there should be no problem with their permission. So if the screws are allowed to loosen, we can proceed further by completely dismantling the individual screws.
We will also loosen the nut
Usually, in addition to the screws, the strut is also attached with one central nut. We cannot do without dismantling it here, of course. If it is also too stiff, we will again help with specific preparation for clearance. As soon as it is free, we can dismantle it in a simple way. At this point, we are confident that the hardest part of the replacement is over, as we already have the strut loose and can remove it.
Replacing the strut is a cakewalk
As soon as we have definitively dismantled the strut, it is time for the last step, which is nothing else than, of course, replacing the strut itself. It is more than clear that we should definitely have it ready here so that we can immediately place it in the desired place. There are more than enough options where we can buy it in this direction. If we look at the first option, it is an original service. It can also be a non-original part. But you can also go the route of second-hand parts. However, we don’t recommend them too much for one simple reason. It is quite natural that the part in question may already be slightly damaged, and we could repeat the replacement in a few months.
So, as soon as we have a new strut ready, we can begin the most important thing, which is the replacement. We will put it in the place where the strut was original. Once it’s here, it only takes two specific steps. The first step is certainly mounting the nut itself. The second step is just the assembly of the individual screws. In both cases, we do not forget that it is necessary to ensure sufficient tightening. Only in this way will we be sure that we did not really screw up the exchange and everything is as it should be.
The exchange is done
Of course, we will also attach another of the dismantled parts to the will, which logically was none other than the engine cover. As soon as we have finished here, we can already lower the car to the ground and test whether the given exchange really took place as it should have taken place. How to do it? Very simply of course. We start the car on flat ground, sit in it, and try to feel any specific vibrations. If they are gone, you can be sure that the replacement of the silent block of the engine went as it should have gone. If they are not gone, the problem is elsewhere than just the faulty strut that was replaced. But usually, we have to say that it is precisely this particular problem. After starting, it should happen that the vibrations themselves will no longer be transmitted to the area of the car body, thanks to which the entire repair took place as it should have taken place.


