There are usually high-quality speakers in the front part of the car, which will allow each driver and his passenger to listen to music. However, the situation may not be so good on the back seats, because either there are no speakers in the back of the car, and if they are, they are of relatively poor quality. For that reason as well, the goal for many may be to install the speakers yourself. How to do it? We'll look at that together.
What will we need?
First and foremost, it is definitely a speaker as such. We should choose its type not only with regard to performance, but we should also choose it with regard to its size and the place where we specifically want to place it. It's good to remember that this particular step is definitely not without a few compromises that will have to be made. And that's mainly in connection with the fact that the more power we want, the bigger the speakers will be.
Furthermore, of course, only a few pieces of basic tools are enough. What we can't do without anymore is the necessary cabling. This should lead from the radio directly to the given speaker. If we have everything ready, nothing is easier than getting to work.
Where do we place the speaker?
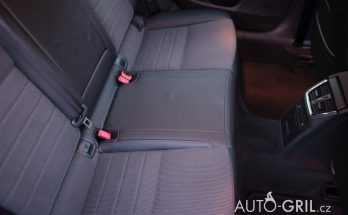
There are basically two possibilities. When mounting a speaker, there are usually two specific locations chosen. Both are connected to the luggage compartment. The first is located in the area of the side plastics, i.e. above the side wall of the luggage compartment. They are usually the plastics on which the given cover of the given space rests.
This may be the second option where you can mount the rear speakers. If it is option number two, we should not forget that rather larger types of speakers are mounted here. It is also true that after installation here we can be sure of a much better sound. The disadvantage is certainly the overall impracticality, both in connection with the fact that we burden the given lid, and in connection with the fact that we not only destroy it, but can also take up space in the luggage compartment.
Preparation is the key
As soon as we are clear about where we will place the individual speakers, we can start preparing. If it will be a space in the form of a side wall of the luggage compartment, the plastic covers must first be removed. They are usually attached with screws. Of course, it depends on the type of specific car, which then depends on how many screws we find here and which specific one it is. Once we have them definitively enabled, we can carefully dismantle the plastic, which frees up space for the placement of specific speakers.
If it is a matter of placing it in the cover of the given luggage compartment, a little more demanding preparation is definitely required. And specifically such that we not only have to take it down, but we also have to cut the necessary holes in it. We will then place the speakers in them. It is important to measure well here, as the holes need to be the same distance from the sides. In the same way, it is also necessary to thoroughly check that the size of the holes will correspond to the size of the speakers. If they are small, it is not a problem to make them bigger. If, on the contrary, they are large, it is a problem.
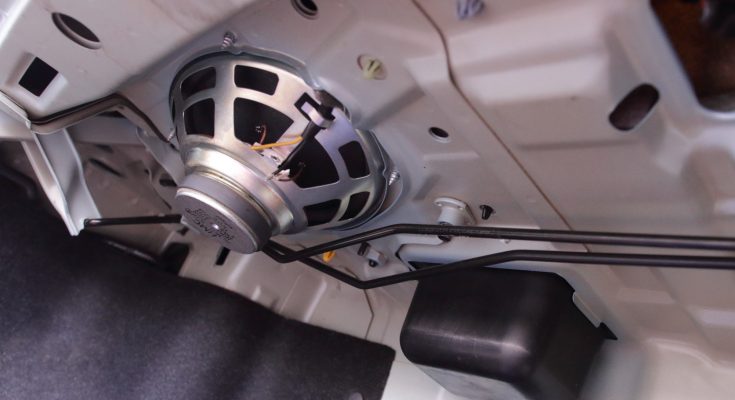
The speaker installation itself
Most of the types that are also intended for installation in passenger cars allow us to put them in place quite simply and also quite firmly with screws. If we do this, we are sure that everything will hold very well. It is best to mount the speaker using all four screws, as this is the only way to be sure that everything will really hold as it should. The problem can arise when screwing not only into the plastic, but also into the given cover. It is therefore a good idea to ask a specific hardware store for screws that will suit this well.
We will connect the speakers
Now all you have to do is plug it in. Cabling is not complicated at all, as all you have to do is stretch the cables directly from our car radio to the speaker in question. If we do that, everything needs to be connected properly. If you do not have much experience in the given direction, it is a good idea to use the services of an auto electrician, who can handle the procedure without any problems. If we have everything plugged in, it should be time for the initial test.
Therefore, turn on the car radio and listen to see if the speakers are playing. If you want to be 100% sure, it is a good idea to set the radio so that all the sound goes only to the rear speakers. If they play really without problems, it is a good idea to also try various other functions, such as bass, or playing only the right or even only the left speaker separately.
We hide the stretched cable
The last stage is only cosmetic modifications. Of course, it is a good idea to disguise the cable we have stretched to the car radio. The most reasonable way seems to be the one when we drag it along the door of our car and gradually hide it under the side plastics. This is how we lead it to the speakers themselves.
Furthermore, in the case of installation in the side of the car, the plastic cover itself must also be returned. Here we proceed very simply, in reverse order. Naturally, this means that we put the plastic on and use the unscrewed screws to mount it again in the desired place.
Final exam
Once all the cosmetic adjustments are finished and everything is done, the only thing left is the final exam. If the installation of the speakers was successful and everything plays as it should, we can just set the radio according to our requirements and then we can go out with the car for the first drive. And this with the certainty that perfect music will be enjoyed not only by the passengers in the front seats, but that the passengers in the back seats will also finally enjoy it in sufficient volume and quality. And this was precisely our main goal.