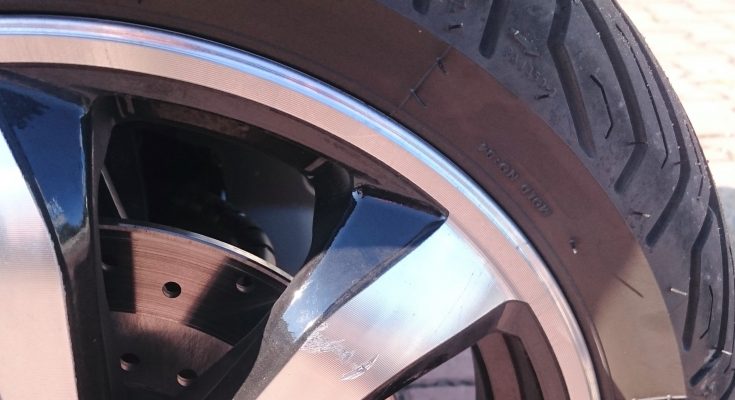
Why are aluminum discs so popular? This is naturally mainly due to the fact that they look great on the car. But that is not their only advantage, as they can also impress with their low weight. Furthermore, let's not forget that due to their construction, they can offer quality cooling for your brakes, especially in the summer. To all this we can also add their rather large and good quality. Even so, you may end up scratching your discs. Like a curb. One careless turn of the wheels is all it takes and the world is in trouble. But they can also be damaged, for example, by snow chains. However, it can also happen that in more demanding terrain, a stone will damage your discs, which will also scratch them quite significantly.
And what to do in such a case? You certainly don't have to throw them away, just like you don't have to buy new ones either. That would be quite expensive. You can go a completely different way. Repairing scratched ALU discs will help you. You don't necessarily need to implement this just by contacting a professional. Especially since his services may be financially unavailable for someone, especially if there are more damaged discs or you want to consolidate the whole set. The repair of aluminum discs can also be carried out by simply handling the entire process yourself. See with us how to do it.
The basis is the necessary equipment
What can't you live without? This is definitely the necessary equipment that is needed to refurbish aluminum discs . But what you definitely don't have to worry about are the possible costs associated with the acquisition, just as you don't have to worry about the equipment not being available. First, get sandpaper of three hardnesses, which will be necessary for the initial sanding. Furthermore, it is an aluminum sealant that you can easily use to cover any scratches that your aluminum wheels may have. We don't end there either, as we only need a filler and a base color. This is precisely related to the preparation of the wheel for painting itself. Once you have all this, all you need is a varnish of any shade and then a clear varnish which will become the top layer.
We start the renovation with sanding
The first step involves sanding your aluminum wheels thoroughly. And so that the particular color must simply go away from them. First, quite naturally, start with a coarse sandpaper and then move on to a finer one. How do you know that the aluminum discs are ready for the repair itself? It's quite simple. You can tell by the fact that they are basically matte in color. In this case, you can start the repair itself, since the preparatory work is definitely done.
Use aluminum sealant
As soon as the preparatory work has been completed, it is necessary to prepare a special aluminum sealant, which you can buy today without any problems in any car supply store. It must also be said that it is quite easy to work with, which you will definitely be able to do. Simply apply it to those places where individual scratches are visible and therefore need a basic repair. Once the sealant is in place, you can just let it harden thoroughly. The moment this happens, you pick up the sandpaper again, with which you grind any resulting unevenness so that the surface of the aluminum wheels is always smooth. With this step, the phase that is connected with the repair of the given scratches is definitely over, and at this moment we can also say that the wheels are definitely repaired.
Prepare the alloy wheels for painting
Now we can say that the repair as such is behind you. But the wheels are still not in a condition where they can be used on your car. Of course, they need to be restored to their original appearance. First of all, it is necessary to carry out the preparation before the painting itself. First, the wheels must be completely degreased. Here you have two options. Either use the classics in the form of spring water, or you can use technical gasoline, or even thinner.
Once the surface of the aluminum wheel is degreased, it is necessary to create a base for the classic color, i.e. for varnish. How to do it? Now you will need a filler as well as a base color. You can't do without both. Once everything is applied to your aluminum bike, all you have to do is wait for it to dry thoroughly. Here, nothing prevents the painting itself. You can entrust this to professionals, but since spray paints are also sold today, we can say with certainty that you can do it yourself without any problems.
Start painting
Which shade will you choose? This is basically just up to you, as it mainly depends on your preferences. But it is ideal to stick to the same or a similar shade that was on the wheels before you started repairing them. So the first step is to spray paint. After that, you just wait for it to dry. At that point, you can repeat the process. For a perfect effect and perfect coverage, we definitely recommend applying the paint in several layers.
Once the last layer is applied, you will of course also let it dry thoroughly. At this moment, it is time for the last stage of the repair, which is the application of clear varnish. It has two advantages. First of all, it can give your paint a much better look and emphasize its brightness. In addition, such a layer also acts as a protection, which is another big plus that we should definitely not forget if your goal is to make the wheels look as good as possible. And it is thanks to the application of colorless varnish that it will succeed. After the varnish dries, all that remains are the typical steps. What specifically? It is quite natural to put the tire itself on the disc, just as it is also the subsequent putting on the disc on the car. Here your alloy wheels will look perfect again, like new.


