The failure of the radiator can be a really big problem, especially in the summer. If it does not work as it should, it needs to be either repaired or completely replaced. This can be done either in a service center, or there is an option to go down the path that involves replacing the radiator yourself. Especially with older cars, it really doesn’t have to be that complicated and almost anyone can do it without any problems.
Where to start?
The first thing to do is to unscrew the tank in which the coolant is located. It is a clearly identifiable tank that is screwed on with several screws. Naturally, when disassembling it, we do not forget another very important thing, which is the need to also unscrew the coolant drain valve. Remember that if you are going to drain the liquid, you also need to think about the fact that it is a chemical substance that definitely does not belong in the wild. Therefore, a container in which you will collect it is essential.
Unscrew the engine cover
Once the coolant reservoir is gone, you can focus on the underside of the car. For this purpose, it is naturally good to have a facility that allows you to lift the car up, or a facility where you have a mounting pit. Only then will you be sure to get to the most important part, which is the lower engine cover. It will also have to be dismantled.
Also, don’t forget that it is held by several screws, so all of them need to be loosened properly. It is also good to think that there will not always be an ideal approach to each of them. It is therefore a good idea to think of a quality set of tools with which you can easily reach even the most inaccessible places. If you have an older car, individual connections can be difficult to loosen, so we recommend a specialized spray that will loosen any rusted parts. After that, it is no longer a problem to crumple up to a full-scale disassembly, after which the lower engine cover is definitively removed.
Disconnect all connectors
Once you have removed the engine cover itself, this means that you are getting to the area of the radiator itself, where there are several important steps that involve removing some of the connectors. The first thing that is absolutely necessary is the important removal of the main hose, which you remove by clicking it out of the lock that connects it to the radiator itself.
Once the hose is also disconnected, you can gradually disconnect the mentioned connectors. If we look at the specific ones, it is mainly the power connector, which is related to the located fan. In the same way, a thermal sensor is also connected here, which monitors the specific temperature. Naturally, disconnect that too.
We disassemble the cooler itself
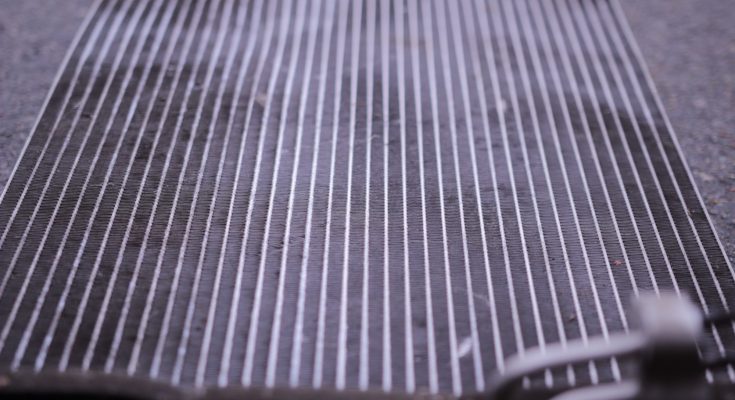
Once everything is disconnected and we have the necessary access to the given area, it is possible to start disassembling the cooler itself. It is usually attached by several screws and it depends on the type of specific car where they are located. Sometimes access to them is simple, sometimes more complicated and in some cases you can’t do without, for example, disassembling the headlight in order to conveniently get to the screws in the upper part. The exact location is usually described, for example, in the owner’s manual of your car, as well as it can be indicated on the Internet, in various discussion forums. This will significantly help you in better orientation, thanks to which you are sure that you will be able to do everything really well.
The last disconnection of the hoses
If you have the screws loosened and dismantled, only the last and most important stage remains, which is related to the disconnection of the next hose. This time it is the upper hose, which has remained in place for the time being. Similar to the lower hose, you can remove it quite simply, first by releasing it from the securing lock. After that, disconnecting it is no longer a problem. At this point, you are fully ready to remove the cooler itself.
Remove carefully
If it is no longer holding anything, you can start gradually removing the cooler itself, including the specific fan. Once you are done, you can of course also remove the fan itself, which you will mount on the new cooler. If you don’t plan to do this, naturally skip this step and start installing the new cooler. Today, you can buy it both new, in auto parts stores, and you have the option of buying a used one, most often at various car scrap yards.
Assembly will take place in the reverse order
If the radiator was removed without any major problems, you are also sure that the installation of the new one itself should not be difficult and you should be able to do it really without any difficulties and without any problems. Naturally, in this regard, you proceed in the opposite order. First, the new radiator is placed in its place, then a decent hose is connected, and then you don’t forget all the necessary screws.
Subsequently, all the necessary connectors and sensors must be connected, which will ensure its correct and trouble-free operation. The last step is the assembly and connection of the container for the cooling liquid, without which this device is naturally indispensable.
Pour in the coolant
We have already done everything necessary. And this means that only the last important phase awaits us, which is related to the fact that you just add the coolant . It is important not only to use the right type, but also to preserve the properties that will ensure that it will definitely not freeze even in the winter. The last step is the correct amount, when you definitely count on the fact that the car’s cooling system is guaranteed to hold a few specific liters of this liquid.


